Staining ties for switches
After my freight car weathering blitz had to take a break due to cold weather (can't spray Tamiya TS-80 indoors due to complaints from management about the smell) I have moved over to preparing ties for the rebuilt Flin Flon yard throat project I started a while back. I have built a number of switches using Fast Tracks jigs, MicroEngineering Code 70 rail and PC board ties.
Building switches is actually more enjoyable than I expected and will be much less expensive than buying RTR switches. I decided that staining the ties ahead of time would give better results, especially after doing some reading and watching some YouTube videos.
I painted the switches (rail and PC board ties) with a mix of rust, dirt and black paint. This is a nice starting colour for rail and the PC board ties. I have also used spray paint (Rustoleum flat camouflage brown) for this but given the cold weather I hand painted instead.
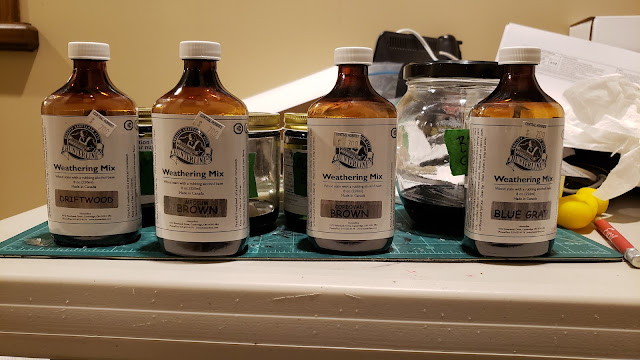
For the wood ties I used four Hunterline stains that I had on hand: Medium Brown, Driftwood, Blue Grey and Cordovan Brown. I may pick up a few other colours as I find them. I put a bit in the bottom of some glass jars and threw a handful of ties into each colour to get some variation in the ties.
I left the ties in the solution overnight to get the staining throughout the ties. I put a few layers of paper towel in an old plastic container and pulled the various ties out of the dye and put them in the container to dry. Definitely wear gloves while doing this as otherwise you will have stained hands from the dyes.
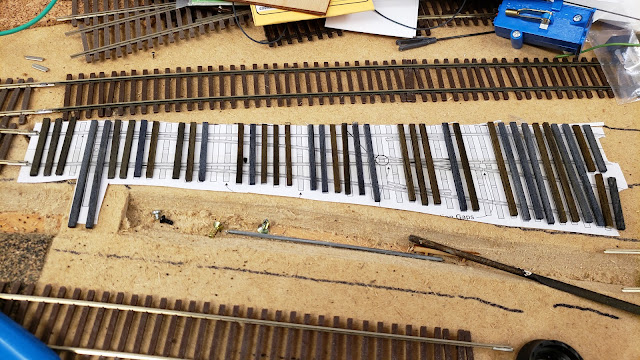
After the ties dried for a few days I laid them out on the diagrams from Fast Tracks. I used double sided tape (Sookwang brand - really good stuff) on the diagram from Fast Tracks to hold the ties in the appropriate positions. I used scale 16 foot ties and cut them to length based on the diagrams.
On a few ties I added some Vallejo black wash, and I also drybrushed a few ties with a weathered grey colour to get more variation in the colours. I used some Vallejo Air grey colours for the drybrushing.
On most handlaid track the one missing item are the tie plates, a common feature of modern track. While you could add individual tie plates that are available from commercial vendors, I went the route of using paint to give the indication that the tie plates are there. Using rust coloured paint and a microbrush I added a rectangle of rust paint on each tie, using the diagram the ties were attached to as a guide.
Painting the rectangles on the ties gives the indication that there is more than just rail sitting on the tie. From normal viewing distances it looks reasonable, and the work goes quickly. I will do this on future handlaid track that is near the front of the layout.
Once everything is satisfactory I'll glue the rail to the ties (not done yet) using contact cement on the rail and ties. The PC board ties are thinner than the wood ties but you won't be able to see this when the track is ballasted in place.
The variation in the wood tie colours adds some nice visual variation to the track. Now I need to do this with my plastic ties on the flextrack as well. Never ending projects on a model railroad.


very effective.
ReplyDeletewhat was your "mix" for the rail?
The rail mix was a drop or two each of Vallejo Air 71.133 Dirt, 71.292 US Loam and 71.080 Rust. I added the various colours until I got something I thought looked good. I don't have a formula per se. You could also add some Anthracite Grey (71.052) as well if you want it a bit darker.
ReplyDelete