Kitmingling - A means to an end 40'boxcar 8' door edition
CN rostered a gigantic fleet of steel 40' boxcars with over 42,000 cars of the 1937 AAR design, both 10' and 10'6" interior height (IH). These cars made up over 2% of the North American boxcar fleet at their peak. To say these cars were ubiquitous is something of an understatement as they could be seen pretty much everywhere.
The 8 foot door version of these cars numbered 5000 cars or over 10% of the CN fleet. However these cars are not commonly seen on layouts as there are not many RTR versions available. Trains Canada produced a version with NSC3 ends and a PS1 style roof, however some of the features like the car body rivets are terribly out of scale. Yarmouth Model Works has a nicely done version of this same car style.
What is not currently available is the 8' door car with improved dreadnaught ends (IDE) and a diagonal panel roof. There were 1900 of these cars so they were relatively common. I decided I needed to represent these cars in my fleet.
Over the years I have picked up a few Branchline Models 40' boxcars (now owned by Atlas) who are the only other manufacturer with an 8 foot door body. These cars appear to be relatively uncommon as I have only found a handful of them. Unfortunately they did not produce a car with the correct IDE ends or 8 rung ladders, but they did make the correct diagonal panel roof.
Once upon a time many years ago you could buy parts from Intermountain, who did make the correct end style for the CN cars. I picked up a reasonable number of the ends as well as the correct Canadian style 8 rung ladders. I used a pair of IDE ends as well as the 8 rung ladders on the car. On the A end of the car I cut down the ladder to a 4 rung version as I was doing a car without a roofwalk.
On the B end of the car I used a Tangent high brake housing and linkage along with one of their modern brake wheels. These are available from Tangent as parts, and they are very nice. I also added a brake platform on the B end cut from a spare brass etching. For the rooftop corner grab I used a length of ladder to form the supports, which I have outlined in a previous post.
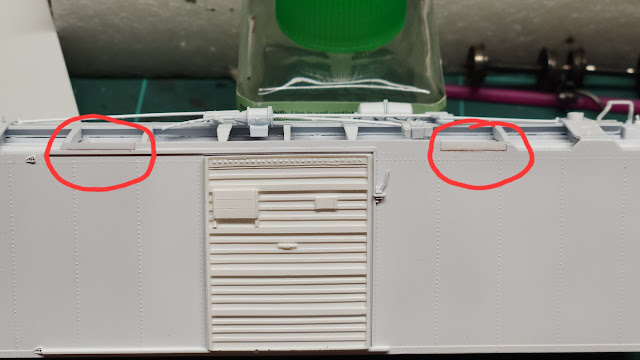
Side sill extensions to match the prototype car. This photo shows the extensions before they were patched and sanded. This shot also shows (upside down) the Sylvan Superior door nicely.Sylvan Scale Models (now produced by Yarmouth Model Works) has a nice resin 8' Superior door that is correct for these cars. It is pretty much a drop in fit on the Branchline car. The side sills on these cars is different from the model, so I added styrene strip cut to the same shape as the prototype and glued it in place. It was patched and sanded to blend into the body.
On the ends I added an end railing mounted on brass stripes. These were drilled and mounted on the ends per prototype photos. The brass strip is an improvement on the styrene strip I used on other cars previously.
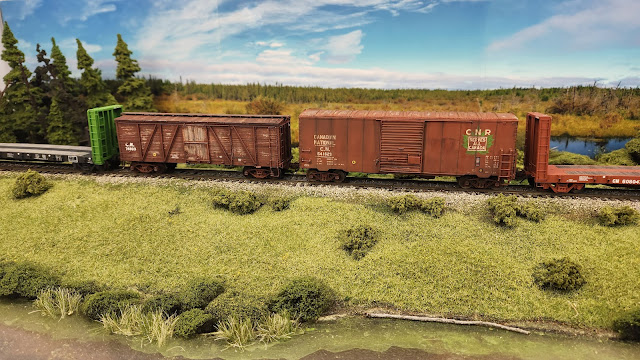
The resulting kit-mingle produced a reasonable version of a CN boxcar. I primed the car with Mr. Color Mr. Surfacer 1000 which is starting to be a favourite primer. I thinned it 50/50 with Mr. Color Thinner. It is stinky stuff, fortunately I have a good spray booth to get the paint odors out of the house which keeps senior management upstairs happy.
I painted the car with Vallejo Air paints. I used the mix suggested by the MRH acrylic paint guide of 2 parts 71.105 Brown RLM26 and 1 part 71.038 Cam. Medium Brown. This gives a reasonable approximation of the colour. Ultimately the car will be well weathered so as long as it is close that is good enough.
Side note: I wanted a peeling paint effect on the roof so I used Vallejo chipping fluid to get this effect. First I painted the roof silver to represent the underlying metal. Then I applied chipping fluid with a microbrush, trying to get a random appearance. Once the chipping fluid was dry I painted the roof with the red #11 blend. After about an hour I wetted the paint and scrubbed with a microbrush, toothpick and cotton swap. This gives a good peeled paint look.
Once the paint was dry on the body I used Vallejo gloss varnish on the areas to get decalled. I used Black Cat CN maple leaf decals along with Microscale ACI labels. Prior to applying the Tamiya TS-80 Matt spray I tried a technique that Boomer Dioramas used on one of his projects. I masked the panels leaving the rivet strips on the car body exposed and air brushed thinned washes of umber paint to get the rivet strips highlighted. This gives an effect simiar to what you see on the prototype. Then I sprayed the Tamiya TS-80 Matt.
One unexpected effect was a crackle texture appeared on the roof, possibly due to too heavy an application of the TS-80 interacting with the paint and chipping fluid. Fortunately the effect actually looks realistic so I didn't bother trying to fix the crackled paint.
I weathered the car primarily with oil paints thinned with Turpenoid. Various colours were used as washes on the car body and roof to get the heavily weathered look that these cars had in the 1980's. I built the washes up, trying to vary the colours to mimic what I see in photos.
The wheels got a black base coat with a follow up coat of Vallejo Game Effects Dry Rust. I added some Pan Pastel dusty brown over this and blended things together. Another car in general freight service has been added to the fleet. Now to get the second car I built (painted in the post 1961 noodle scheme) weathered and finished.
February 28, 2024 update
I finished up the companion car to 541629, CN 546162. This is the same car type with the CN noodle. Painted with TLT CN red #12 and decaled with Black Cat Decals. The car was weathered using photos as a guide - believe it or not it was even more beaten up in real life! I used oil washes and some Pan Pastel to finish off. I did the vertical panel rivet strips with airbrushed washes of burnt umber paint thinned down using multiple passes. I'm happy with how these cars turned out - now someone will release them in RTR...


Comments
Post a Comment